[Article] WPF Wizard control with MVVM support
Introduction
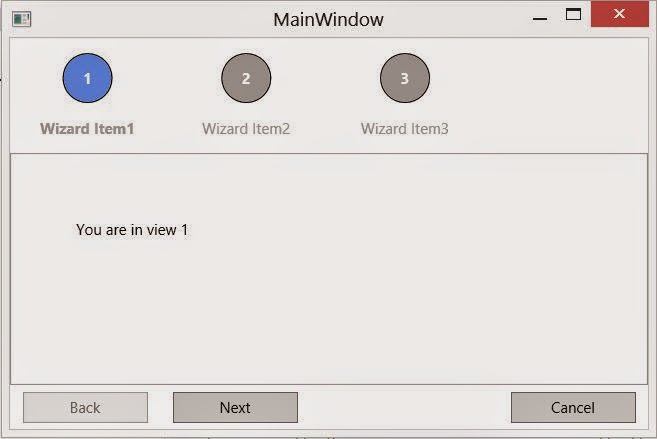
In this article I am presenting a custom wizard control which supports MVVM approach. Here we will see how to use this control also we will see the features this control exposes. You can download this control from Github page. Contribution to this control will be appreciated. Also you can download the complete solution which makes use of this control from here. Once the wizard control is implemented, it will look like as shown below.
How to use this wizard control?
This control comes in three files.
- Wizard.cs
- WizardItemHeader.cs
- IWizardItem.cs
Wizard.cs is the main file which contains the implementation of this custom control. This file is dependent on WizardItemHeader.cs which is a structure that the control uses internally. If you are not following MVVM approach, then what you need is just these two files. If you are following MVVM then you will require IWizardItem.cs
IWizardItem.cs is an interface which when implemented in your ViewModel, will expose more features of this control. You have to optionally implement this interface in your ViewModel of the view(s) which you are going to display in wizard. The interface members are as shown below.
public interface IWizardItem
    {
        /// <summary>
        /// This method should return the header for wizard item to display
        /// </summary>
        /// <returns> A string value.</returns>
        string GetHeader();

        /// <summary>
        /// This method will be invoked to check whether this item can be displayed or not.
        /// </summary>
        /// <returns>A boolean value indicating true or false status</returns>
        bool CanDisplay();

        /// <summary>
        /// This method will get invoked when the wizard item becomes the active item.
        /// </summary>
        void OnWizardItemNavigatedTo();

        /// <summary>
        /// This method will get invoked on the current wizard item when the control is moved to next wizard item.
        /// </summary>
        void OnWizardItemNavigatedFrom();
    }
Now we will see how to use this wizard control in XAML. You can use this control just like any other control. The xaml declaration of this wizard control is as shown below.
<wizard:Wizard CancelCommand="{Binding CancelCommand}"
OkCommand="{Binding OkCommand}"
Orientation="Top"
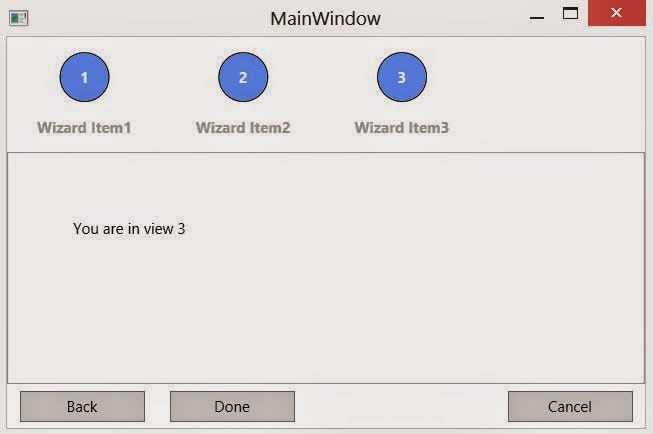
FinalButtonText="Done"
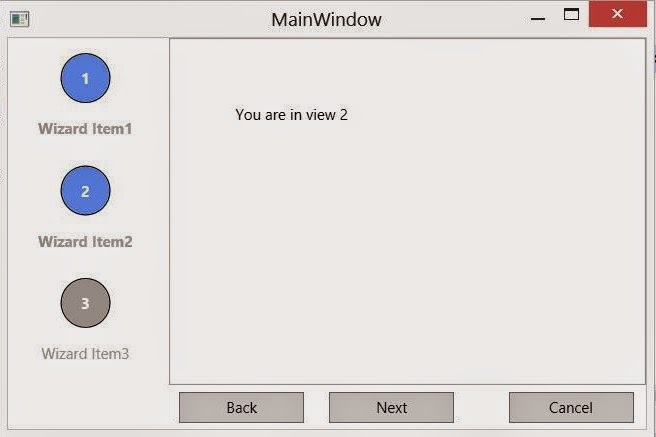
WizardItems="{Binding WizardItems}" />Here CancelCommand will be executed when user clicks on the cancel button. OkCommand is the command which will be executed when the user is in the final step and user clicks on the next button. Orientation is the way the wizard displays the items. Say for instance, if we assign the orientation as “Left” then the control will be displayed as shown below.
FinalButtonText is where we can assign the text to display on the next button when we are at the final stage of the wizard. Now finally WizardItems is where you have to assign the list of view objects. The control will take the view in its order as it is assigned in the list. Below is a sample initialisation of the WizardItems.
public MainWindowViewModel()
 {
   WizardItems = new List<object> { new View1(), new View2(), new View3() };
 }

public IList<object> WizardItems { get; set; }
This control also has shortcuts the shortcut associated with the back button is LEFT Arrow key and the shortcut associated with next button is RIGHT arrow key.or Enter key
Some concerns addressed
Some of the concerns people have regarding wizard control are as below.
- How to share/collect data from each view.
- How to control the navigation or how to validate before navigation.
public interface IWizardItem
    {
        /// <summary>
        /// This method should return the header for wizard item to display
        /// </summary>
        /// <returns> A string value.</returns>
        string GetHeader();

        /// <summary>
        /// This method will be the first to get invoked even before the OnViewActivated call. This method will pass a shard object to views in wizard where they can collect the shared object.
        /// </summary>
        /// <param name="sharedObject">
        /// This is the shared object. This will contain information from other views in the wizard.
        /// </param>

        void CollectSharedObject(object sharedObject);

        /// <summary>
        /// This method will be invoked to check whether this item can be displayed or not.
        /// </summary>
        /// <returns>A boolean value indicating true or false status</returns>

        bool CanDisplay();

        /// <summary>
        /// This method will get invoked when the wizard item becomes the active item.
        /// </summary>
        /// <param name="autoAcknoledgeNext">
        /// The auto Acknoledge Next. Setting this to true will help wizard skip this view and take you to the next page automatically.
        /// </param>

        void OnWizardItemNavigatedTo(ref bool autoAcknoledgeNext);

        /// <summary>
        /// This method will get invoked on the current wizard item when the control is moved to next wizard item.
        /// </summary>
        /// <param name="canNavigateAway">
        /// The can Navigate Away. This value when set to false, will not allow navigation from this view. You can use this to do some validation before you navigate to next view.
        /// </param>

        void OnWizardItemNavigatedFrom(ref bool canNavigateAway);
    }
IWizardItem is the interface which you need to implement on the viewmodel for the view which you will show in the wizard. Here wizard also exposes a property called “SharedObject” this can be of any type which. The wizard will then pass it to the viewmodel of the view currently displayed. So the viewmodel can collect it and save data on to this and can be used at later stage. Now you can use this wizard in wpf as shown below.
<wizardView:Wizard CancelCommand="{Binding CancelCommand}"
      OkCommand="{Binding OkCommand}"
      SharedObject="{Binding SharedObject}"
      Orientation="Top"
      FinalButtonText="Done"
WizardItems="{Binding WizardItems}" /> I am a lead engineer at a prominent wind turbine manufacturing firm. My interests span a diverse range, and immersing myself in technology is one of them. This platform serves as my primary knowledge base, where I seek information and insights. Moreover, I utilize this platform to share my experiences and experiments, hoping they may benefit those following a similar path. It's important to note that the suggestions I express here are based on my best knowledge at the time of writing and may not necessarily represent the optimal solutions. I wholeheartedly welcome any comments you may have to improve or refine my ideas. Your feedback is greatly appreciated and valued.