How to test an application in limited network bandwidth
Introduction
It is important that we test an application in all network conditions. This is because we may want to put demand on a system or device and measure its response to determine a system’s behavior under both normal and anticipated peak load conditions. This makes sure that the application is robust enough to handle all the network conditions before we roll out to users. It would be a painful task to do this kind of testing without the help of any software which hook up the adapter and controls the packet flow. In the absence of such software we will have to manually pull the network wires every time. Also this approach won’t help us test the spiky network conditions. To help us in these testing we have a tool which is called Network Emulator for Windows Toolkit (NEWT). In this article we will see how to configure and use Network Emulator Toolkit to test an application in limited network bandwidth.
Network Emulator Toolkit
NEWT is a software-based solution that can emulate the behavior of both wired and wireless networks using a reliable physical link, such as an Ethernet. It is available in a 32 Bits version and a 64 Bits version. You can download this from https://blog.mrpol.nl/2010/01/14/network-emulator-toolkit. This is a pretty handy tool which can mimic all the behaviors of a network. It can be configured to setup latency on packets in the network and can be configured to raise random errors and can be configured to not to deliver some packets and many more. Here I will show some of handy features of this tool. But all other functionality will be self-explanatory once you start using this tool.
1. Configure Network Emulator Client for limited bandwidth.
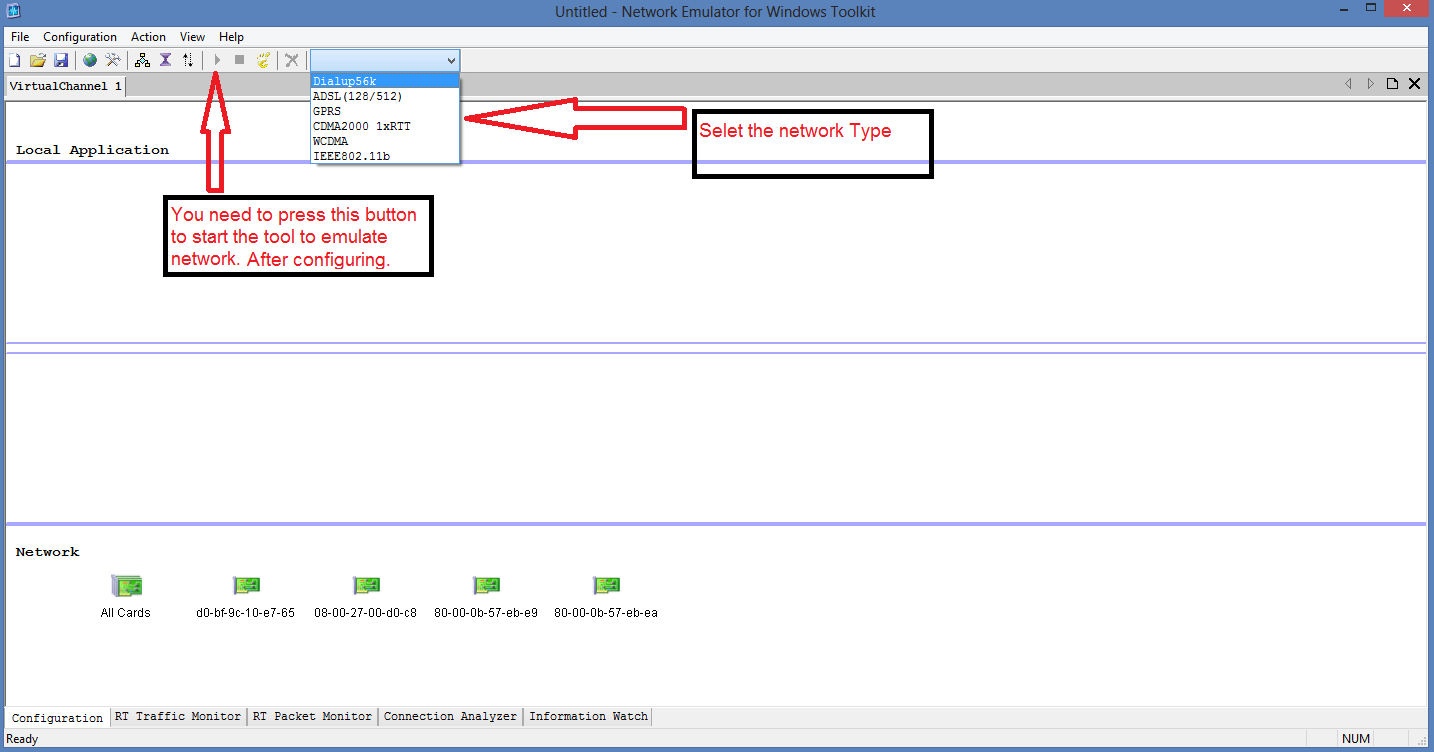
This setup is relatively simpler. The network emulator has an option to select the network type. We could choose the dial up network so that it allows packets up and down as if we have a dial up network.
Once installed, open the Network Emulator Client in administrator mode. This will open up Network Emulator Client as shown in the figure below. Here you can see the drop down to select the network types. Select the dial up option from it. It then automatically opens up the default configuration for the dial up setup. For this example the only thing which we require is this configuration. Now we have to press the start button and the network emulator will start controlling the packets.
2. Configure Network Emulator Client to mimic spiky network which can also drop some packets.
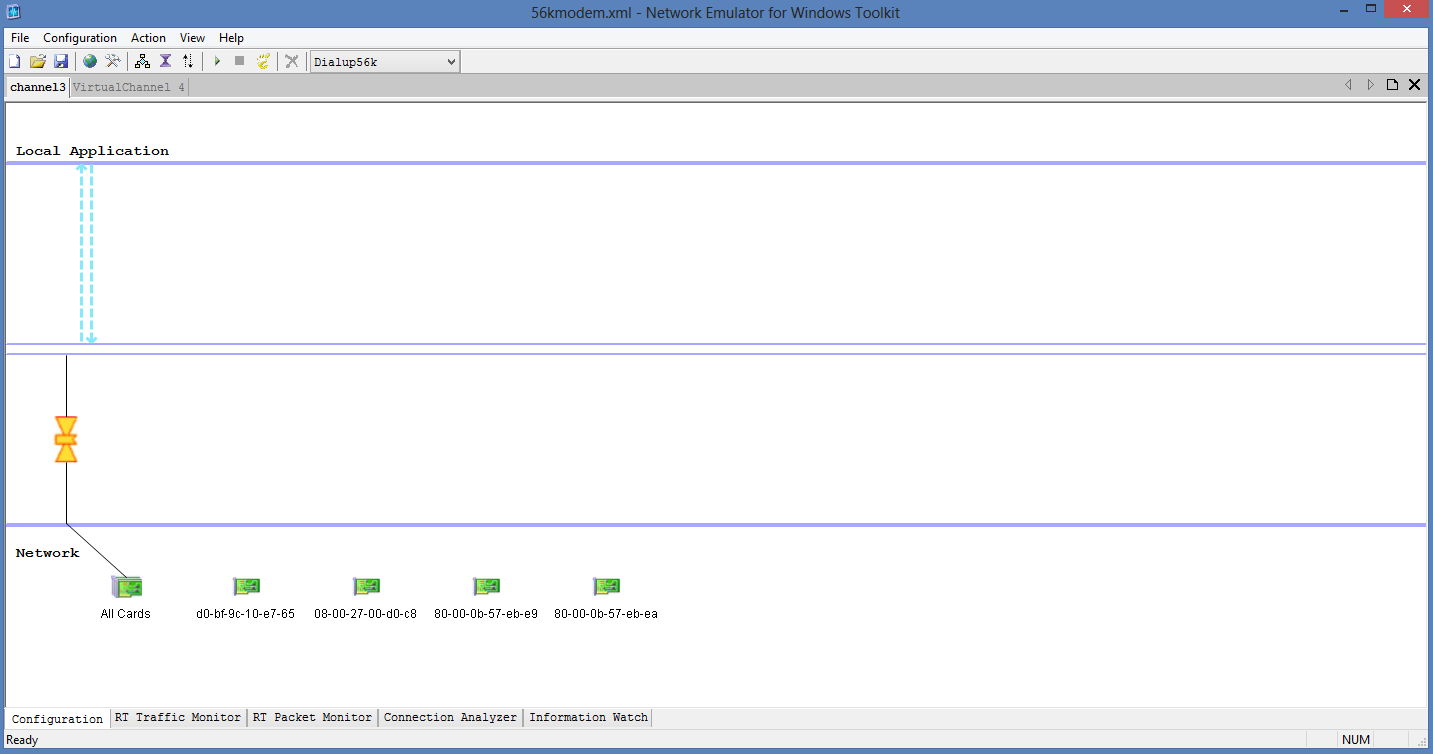
In order to configure the advanced scenarios, let us see two important configurations in network emulator. These are Link and Filter. Link defines the network behavior when sending and receiving packets. This configuration can be used to configure packet loss, network error, packet latency, bandwidth and spiky network (connect/disconnect). Filter is used to configure the sender and receiver to which the link configuration is applied. With filter configuration you can control whether the link configuration should be applied to all traffic or to traffic from a particular IP. These configuration objects are as shown in the image below.
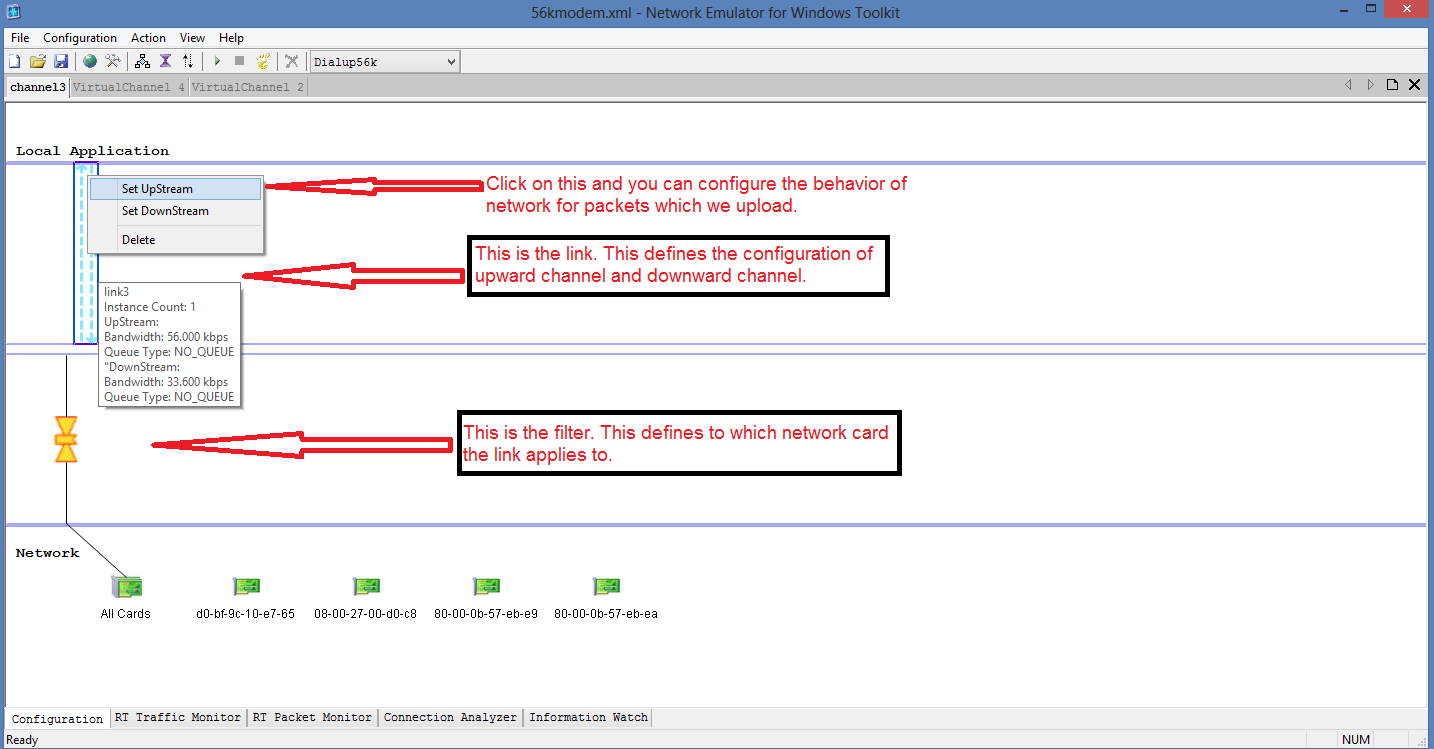
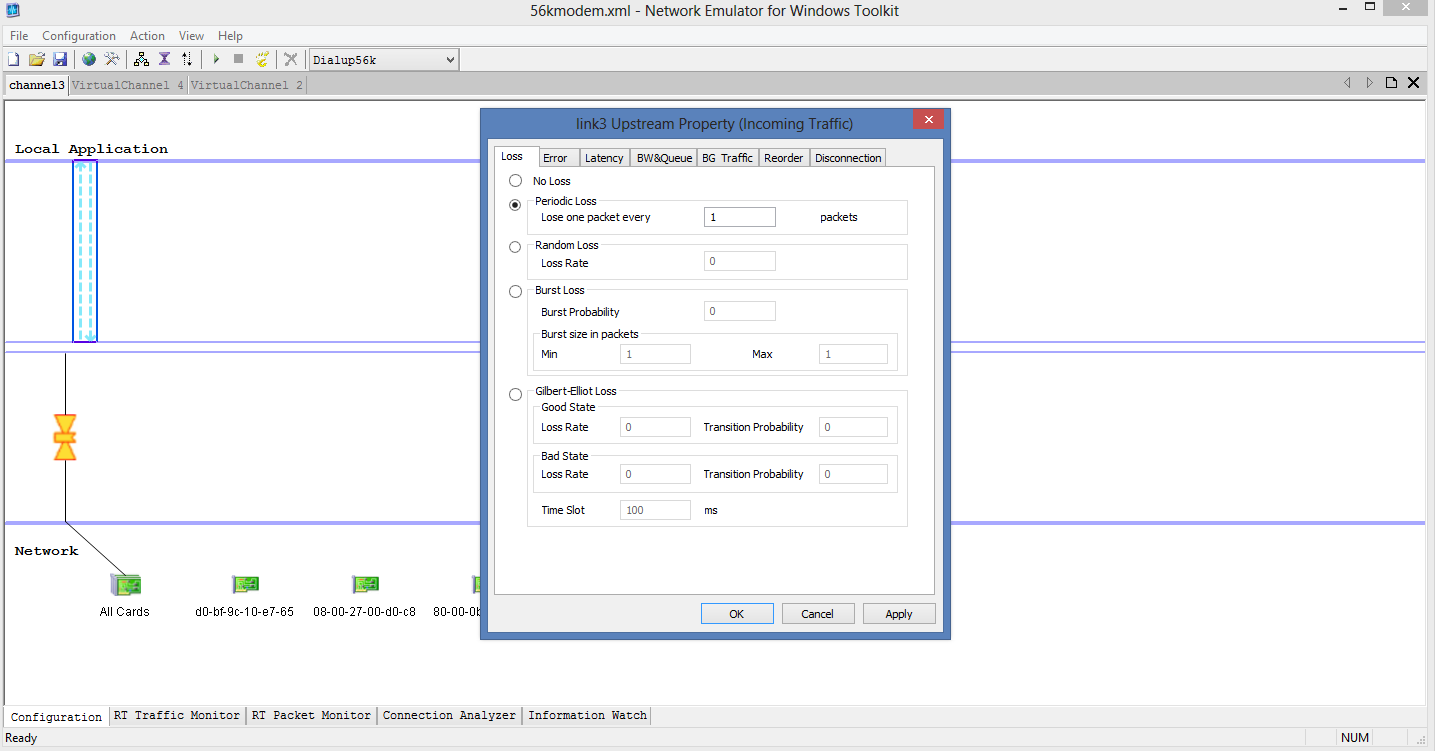
In order to configure this scenario, we have to first select the network type, let us use the dial-up network this time. You can select this from the drop-down at the top just like the way you did it in the first scenario. This opens up a channel page where the link and filter is configured. Right click on the link object and you can see a pop up window with options for UpStream and DownStream. Both have the same configuration. UpStream defines the network behavior for packets which are send from the local machine and the DownStream defines the other way. When you click on one of these, it opens up a window where you can configure loss, error, latency, bandwidth, and connect disconnect behavior of the network. This is as shown in the image below. The default option is “No” we have to select the appropriate one which we want.
The filter option is set by default. If you want to control the filter, you can right click on it and say delete. Now from the menu in the top bar, select “Configuration” and then select “New Filter”. Here the default option is all network which says the link configuration will be applied to all network cards. You can also see an option of selecting the sender and receiver, you can use this option if you want to control traffic from a particular source. Once configured, you need to press on the start button and it will control the behavior of the network.
 I am a lead engineer at a prominent wind turbine manufacturing firm. My interests span a diverse range, and immersing myself in technology is one of them. This platform serves as my primary knowledge base, where I seek information and insights. Moreover, I utilize this platform to share my experiences and experiments, hoping they may benefit those following a similar path. It's important to note that the suggestions I express here are based on my best knowledge at the time of writing and may not necessarily represent the optimal solutions. I wholeheartedly welcome any comments you may have to improve or refine my ideas. Your feedback is greatly appreciated and valued.